RHA fillers are becoming increasingly popular for their ability to enhance facial features while maintaining a natural look. If you’re considering an RHA filler appointment, you might wonder what the process involves and what to anticipate during your visit. This guide will walk you through each step, helping to demystify the experience.

Step 1: Initial Consultation
During your initial consultation, your practitioner will discuss your goals and assess your facial structure to determine the best approach for your RHA fillers.
This is not just a formality; it’s an opportunity for you to express what you’re looking for. The practitioner will take the time to understand your concerns regarding facial volume and contour.
A thorough evaluation of your skin type will also be conducted, which is essential for customizing the filler to meet your unique needs. Together, you will explore different options and styles to ensure you feel empowered about your choices.
Additionally, you’ll receive crucial information about the types of RHA fillers available, helping you feel informed as you embark on this beauty journey.
Step 2: Treatment Preparation
Your practitioner will prepare the treatment area, ensuring it is clean and ready. You may also discuss any numbing options to minimize discomfort during the procedure.
This moment is crucial; you’ll likely be asked to sit comfortably while the area is sanitized, and the practitioner ensures all tools are sterile. It’s all about creating a safe and soothing atmosphere.
If you have opted for a topical numbing cream or even an injection for local anesthesia, this is when it will be administered. Expect to spend some time here, as allowing the numbing agent to take effect is an important step for a more comfortable experience.
Preparing for treatment is about setting your mind at ease as well. Take a deep breath, and allow any jitters to dissipate as you’re getting ready for this transformative procedure.
Step 3: The Injection Process
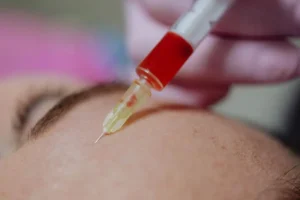
The RHA filler will be injected into specific areas as discussed in your consultation. This process usually takes about 30 minutes, and you can expect some minor discomfort.
While the injections are happening, your practitioner will maintain a conversation with you. This not only helps distract you but also allows for any adjustments if necessary as they ensure the results align with your vision.
The sensation can vary from person to person; some may describe it as a brief pinch while others might feel a bit more pressure. Remember that each injection is strategically placed to achieve optimal results, focusing on enhancing your natural beauty without making you feel overly
The entire process is typically swift, and before you know it, you’ll be all done! Many clients are surprised at how quick it goes compared to what they had imagined.
Step 4: Post-Treatment Care
After your appointment, your practitioner will provide instructions on post-treatment care, including what to avoid and how to care for your skin as the fillers settle in.
You might be advised to avoid vigorous exercise, direct sunlight, or heavy makeup for a short while—these are all essential tips to ensure your results last longer.
It’s crucial to listen carefully to these guidelines. Following post-care instructions will not only enhance the longevity of your fillers but also help to minimize any potential side effects such as swelling or bruising.
Finally, don’t hesitate to reach out to your practitioner with any questions you may have after your treatment. They’re there to support you and ensure the best possible outcome!
Wrap Up Your RHA Filler Experience
By understanding what to expect during your RHA filler appointment, you can feel more relaxed and confident about the process. Remember, communication with your practitioner is key, so don’t hesitate to ask questions and share your concerns.